I've been busy lately trying to do all the things I'm supposed to do, plus get Teen1 ready for graduation and her trip to England, plus get a party organized for Sunday, plus work... and I'm afraid blogging has taken a back seat. And will continue to for the next week or so. Sorry. How about if I show you what I do at work?
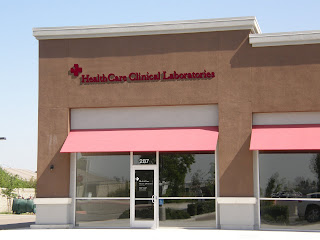
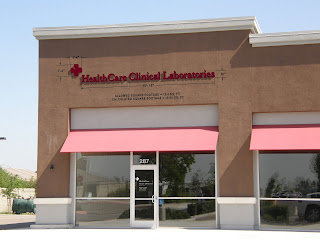
 We make signs and part of our job is to show the customers how beautiful the proposed sign will look. So first I go out to their location and take a photo of the storefront.
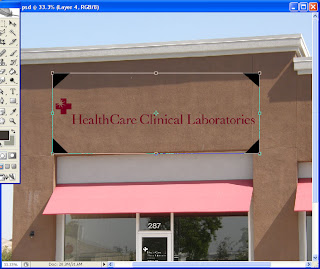
Then using PhotoShop I add the proposed sign to the photo. Notice those black triangles in the corners? I put those on the artwork in my vector based program before I imported it to PhotoShop. They help with size and perspective. Above you see how it looks before adjusting for perspective. Below I have started the process by rotating it a little...

and now I have adjusted the perspective using Transform>Distort. I simply adjusted the corners to match the lines on the building while holding down the Control key.

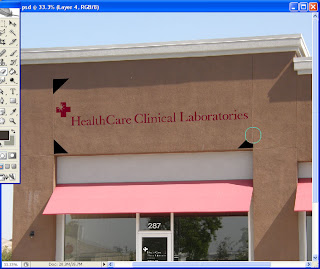
Now all I have to do is erase the triangles and we can see how the sign will look.
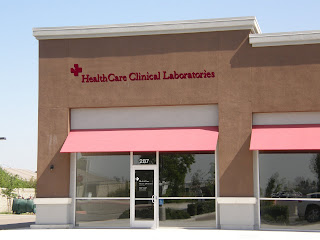
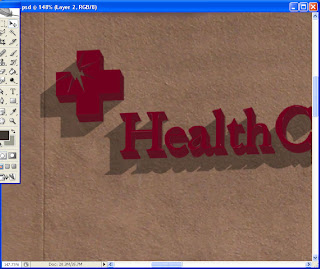
But I like to make my photo mock-ups to look more realistic, so I have added the edge of the letters and a shadow too. On the shadow layer I decreased the opacity so any building details would still show; like that crack you see below.
So below is the finished photo. Looks pretty real, doesn't it? But
il est faux! Nonetheless, it sold the job, so I'm happy.
Actually, I added the dimensions on the finished photo too because the customer has to get landlord approval and they will want to know not only what the sign will look like, but the size of it.
So anyway, that's what I do at work. And now that I've told you all my secrets so you could do this too, do you want a job?

 I recently volunteered to paint a wall sign for a local teen music venue and today was the day to make good on my promise. So I dug out these OLD brushes and cleaned two of them. These brushes are called "fitches" and some of them are probably 30 years old. I can't tell you who they really belong to, because in a sign shop no one really owns the fitches; they just belong to the shop. (Now quills are a different story; NOBODY shares their quills. In fact I used to put a dab of pink paint on the end of mine so none of the men would want to use them.) I can't remember the last time I even painted a wall sign - that's what it's called when you paint letters directly on someone's building - but it had to be a long long, time ago, because those brushes were filthy.
 Next I made a paper pattern and perforated it. In the old days we would have hand drawn the letters on the paper, but I used the computerized plotter.
 Then bright and early Teen2 and I got to the jobsite and hauled our stuff up onto the canopy of the building. Working on a canopy is pure luxury - you have a wide stable work area and you can drip paint and no one knows! We taped the pattern up on the first side, pounced it, and got to painting by 8:00am. My helper looks happy, doesn't she?
 The making of a "Wall Dog" typically starts with the helper doing the heavy lifting and filling in behind the journey
 We were really hot even though it was only 9:30 when we finished the East side. Thank goodness the other sign faced North.
 On the second side we decided to work from right to left; it doesn't make any difference when you have an exact pattern, so here she is finishing up the last letter at 11:20 and she still looks happy! I guess my little "Wall Puppy" could turn into a "Wall Dog" someday; I'd be so proud.
 Here's the finished product. Not exactly the font I would have chosen, but the customer is always right, even when the sign is donated.


